Time-Lapse movies with gphoto2
About
In this page I describe how to produce time-lapse movies using gphoto2. Everything started when a friend lent me his old Canon Powershot A40 digital camera. I then started experimenting with ghpoto2 to capture image and produce time-lapse movies of the clouds; there are plenty of such movies on YouTube, and I wanted to do my own.
Required software
This is the list of the required software:
- gphoto2 together with a camera it can remotely control. If you have a Canon PowerShot A40, be sure to use the latest version of gphoto2, as I contributed a small patch to enhance support for it.
- MPlayer and MEncoder, which are used to encode the movies into a high-quality MPEG or divx (or whatever format you like).
- FFmpeg, to produce FLV movies for embedding in web pages.
- Flowplayer, an open-source (GPLv3) Flash Video movie player. This is needed if you want to embed movies in your web page without using YouTube.
Acquiring images with a digital photo camera
First, you need to acquire the snapshots somehow. gphoto2 can remotely control some digital cameras. The idea is to sit the camera on a tripod and let gphoto2 take pictures at regular intervals. gphoto2 allows the user to control different aspects of the camera (exposure time, aperture and so on). If you are using a Canon PowerShot A40, you must first put the camera in "Play" mode using the round selector on the back. Only in Play mode this camera can be remotely controlled.
Unfortunately, not all cameras can be remotely controlled. For those which can, it is possible to check which capabilities are supported using this command:
The Canon PowerShot A40 display the following capabilities:
/main/camera/model
/main/camera/owner
/main/camera/capturesizeclass
/main/camera/iso
/main/camera/shutterspeed
/main/camera/zoom
/main/camera/aperture
/main/camera/resolution
/main/camera/focusmode
/main/camera/flashmode
/Main/camera/beep
/main/camera/datetime
/main/camera/setcameratime
/main/camera/firmwareversion
/main/camera/driver
/main/Driver/list_all_files
Unfortunately, it is not possible to remotely control all aspects
of the A40; for example, shutterspeed and
aperture can not be changed. This seems a limitation of
the camera rather than gphoto2, as even the proprietary Canon Remote
Capture application can not change these parameters. To change the
value for a configuration parameter, you can use the following:
where name is the name of a parameter (e.g.,
/main/camera/flashmode) and value is one of the
admissible values for it. You can figure out which are the admissible
values by issuing this command:
If your camera supports remote capture, you should be able at least to do the following:
The --capture-image-and-download flag instructs gphoto2
to capture an image using the current camera settings and download it
to the host PC. The --filename flag sets the filename for
the image which will be saved on the local directory. In this case,
each captured image will be named YYYYMMDDhhmmss.jpg,
where YYYY is the year, MM is the month and
so on. For example, 20080608080742.jpg is the name of
the snapshot taken on june 8, 2008 at 08:07:42AM. Using this naming
scheme has the advantage that the lexicographic order of the file
names is the same as the chronological order in which the images were
taken. This will help mencoder to assemble the images in the right
order.
Capturing with the Canon Powershot A40
This is the list of values which are currently accepted by some of the configuration variables for the Canon PowerShot A40. Note that your camera might have different names for the configuration variables, and these might take different values.
/main/camera/iso

Choice: 0 ISO 100
Choice: 1 ISO 125
Choice: 2 ISO 160
Choice: 3 ISO 200
Choice: 4 ISO 250
Choice: 5 ISO 320
Choice: 6 ISO 400
Choice: 7 ISO 500
Choice: 8 ISO 640
Choice: 9 ISO 800
Choice: 10 ISO 1000
Choice: 11 ISO 1250
Choice: 12 ISO 1600
Choice: 13 ISO 3200
Choice: 14 Unknown


/main/camera/zoom

Choice: 0 No zoom
Choice: 1 1
Choice: 2 2
Choice: 3 3
Choice: 4 4
Choice: 5 5
Choice: 6 6
Choice: 7 7
Choice: 8 8
Choice: 9 Zoom 9 (max)
Choice: 10 Unknown


/main/camera/resolution

Choice: 0 RAW
Choice: 1 Small Normal JPEG
Choice: 2 Small Fine JPEG
Choice: 3 Medium Normal JPEG
Choice: 4 Medium Fine JPEG
Choice: 5 Large Normal JPEG
Choice: 6 Large Fine JPEG
Choice: 7 RAW + Small Normal JPEG
Choice: 8 RAW + Small Fine JPEG
Choice: 9 RAW + Medium Normal JPEG
Choice: 10 RAW + Medium Fine JPEG
Choice: 11 RAW + Large Normal JPEG
Choice: 12 RAW + Large Fine JPEG


/main/camera/focusmode

Choice: 0 Auto focus: one-shot
Choice: 1 Auto focus: AI servo
Choice: 2 Auto focus: AI focus
Choice: 3 Manual focus


/main/camera/flashmode

Choice: 0 Flash off
Choice: 1 Flash on
Choice: 2 Flash auto
Choice: 3 Flash red eye removal
Choice: 4 Flash on (assist light fires)


/Main/camera/beep

Choice: 0 Beep off
Choice: 1 Beep on
The specific capture command which I used with the Canon A40 was the following:
the meaning of each parameter being:
--set-config beep=0- Disable the beep which is normally emitted by the camera when it focuses the image
--set-config flashmode=0- Disable the flash
--set-config resolution=3- Acquire the image at medium resolution (1024×768)
-I 20- Use a 20 seconds interval between two snapshots
-F 3150- Capture 3150 snapshots
In general, to get a smooth video you should use a small value of
the -I parameter. For my A40 it was not reasonable to set
an interval less than 10 seconds, as taking the picture and
downloading it to the host took around 6 seconds.
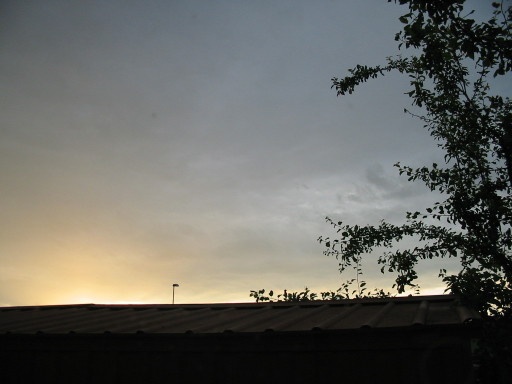
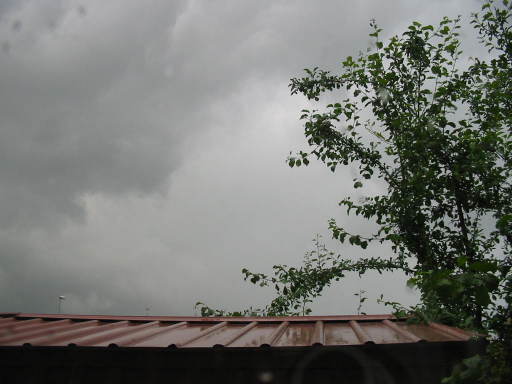
This is a sample picture taken on 2008-06-08 at 09:59:22

Labeling the images
Sometimes it is useful to overlay the timestamp to each frame, so
that the movie will contain a visual indication of the capture
times. Labeling images is quite easy to do using just ImageMagick and a little bash
scripting. Create a script named label_image.sh with the
following content:
Invoking label_image.sh 20080608095922.jpg will create a
new image caption_20080608095922.jpg with the timestamp
on the lower right corner, like this:

Making the movie
Now that you have a directory full of pictures, it is possible to make a movie from them using MEncoder. The command I used is the following:
This produces an mpeg4 stream inside an AVI container. The output framerate is 12fps, and each image is rescaled at 640×480 resolution before encoding. This command will produce a high-quality, LARGE file. Just to give you an idea, encoding 3150 frames will produce a movie of 192289210 bytes (see later).
To produce a FLV movie you can use the following command
This produces a lower quality movie at qvga resolution (320x240),
but with a significant reduction in file size (movie.flv
takes only 6618134 bytes). You can view the resulting movie using a
FLV-capable movie player, such as MPlayer or VLC. It is
also possible to embed the .flv movie in a web page using Flowplayer, an open-source Flash
movie player. You can see the result here:
The video quality can be improved by using a higher bitrate; this
can be done with the -b brate flag of FFmpeg,
where brate is the bitrate in bits/second (default is
200kb/s).
The following table summarizes the space requirements of different movie formats at different bitrates.
| Encoding | File size (bytes) | Quality |
|---|---|---|
| Raw images: 3150 medium quality JPEGs, 1024×768 each | 363355038 | Original |
| mencoder "mf://*.jpg" -mf fps=12:type=jpg -ovc lavc -lavcopts vcodec=mpeg4:mbd=2:trell:vbitrate=7000 -vf scale=640:480 -oac copy -o movie.avi | 192289210 | Excellent |
| ffmpeg -i movie.avi -s qvga movie.flv (default bitrate 200kb/s) | 6618134 | Good (small picture) |
| ffmpeg -i movie.avi -s qvga -b 150000 movie.flv | 5036483 | Fair |
| ffmpeg -i movie.avi -s qvga -b 100000 movie.flv | 3494717 | Poor |
Using a webcam to capture snapshots
Sadly, my friend's trusty A40 broke down (more details below), so I tried to experiment using a webcam to capture snapshots. A webcam has a much more simple electronics than a digital photo camera, and has no moving parts. For this reason, it represents a good candidate for taking plenty of pictures reliably. Moreover, with a webcam you are able to achieve a higher capture rate.
Unfortunately, it turns out that cheap webcams often provide poor image quality. One of the webcams I tested (a Creative Live! Cam Optia) is useless for taking outdoor pictures, as it produces overexposed images. Probably the webcam sensor is somewhat optimized for low light conditions, as in fact it produces good images with very dim light.
At the time I wrote this page, I tested the following webcams:
- Trust SpaceCam 300; this is my very old webcam, capable of a resolution of 640×480 pixels. The camera is supported under Linux with the ov511 driver.
- Creative Live! Cam Optia (ID 041e:4057). It provides a physical resolution of 640×480 pixels, and is supported under Linux with the uvcvideo driver.
- Logitech Quickcam Pro 9000. I borrowed this one for a short time from a friend. This camera is capable of a physical resolution of 1024×768 pixels, and is supported under Linux with the uvcvideo driver as well.
I used fswebcam to acquire a snapshot every 10 seconds.
The Logitech Quickcam Pro 9000 is the best one in term of image quality, and I recommend it for outdoor pictures. Moreover, Logitech is actively supporting open source development on their cameras. Unfortunately it appears that newer QuickCam Pro 9000 models are affected by a firmware issue that might make them unstable under Linux.
The Creative Live! Cam Optia produces severely overexposed outdoor images, but works fine in dim light conditions. I do not recommend it for outdoor use. The old Trust webcam has overexposure problems as well, but the images are not as overexposed as the ones produced by the Optia. Unfortunately, the image quality of the pictures taken by the SpaceCam 300 is very bad: images are blurred regardless how you adjust the focus ring.
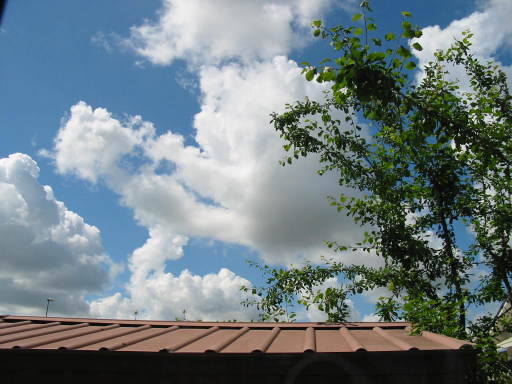
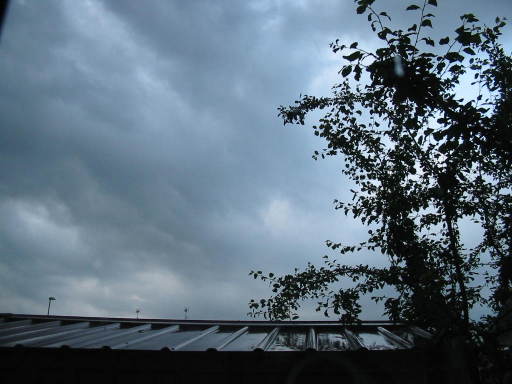
The following two pictures were taken with a Panasonic Lumix FZ7 digital photo camera (left) and with the Creative Live! Cam Optia (right). As you can see, the picture taken with the Creative Live! Cam lacks any detail in the bright areas.
Panasonic Lumix FZ7

Creative Live! Cam Optia

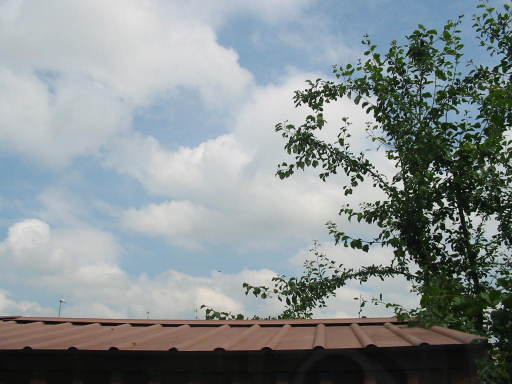
The following two pictures were taken with the Logitech Quickcam Pro 9000 (left) and Creative Live! Cam Optia (right). Both snapshots were taken exactly at the same time.
Logitech Quickcam Pro 9000

Creative Live! Cam Optia

As can be seen, there are no visible features in the image taken with the Creative Live! Cam Optia. Also, note that the image is somehow yellowish (the yellow tint can be improved by playing with the gamma correction control of the camera). Also, there are problems setting the exposure manually on the Live! Cam Optia; manual exposure works fine under Windows, but even at the minimum value the image is overexposed anyway, exactly as the snapshots above.
Update 2018-12-18 After many years, I still have this camera and use it for video calls. However, while playing with the UVC controls, the video became overexposed and I could not fix it even unplugging/replugging the device (!!). Changing the exposure manually with guvcview did not seem to help. However, I discovered that there are some specific exposure values that do affect the image quality; the values are:
- 39 (darker)
- 78
- 156
- 312
- 625
- 1250
- 2500 (brighter)
To query which UVC controls are available:
that produces the following output:
Listing available controls for device video0:
  Brightness
    ID      : 0x00000001,
    Type    : Dword,
    Flags   : { CAN_READ, CAN_WRITE },
    Values  : [ 0 .. 100, step size: 1 ],
    Default : 30
  Contrast
    ID      : 0x00000002,
    Type    : Dword,
    Flags   : { CAN_READ, CAN_WRITE },
    Values  : [ 0 .. 6, step size: 1 ],
    Default : 2
  Saturation
    ID      : 0x00000004,
    Type    : Dword,
    Flags   : { CAN_READ, CAN_WRITE },
    Values  : [ 0 .. 8, step size: 1 ],
    Default : 3
  Hue
    ID      : 0x00000005,
    Type    : Dword,
    Flags   : { CAN_READ, CAN_WRITE },
    Values  : [ -4 .. 4, step size: 1 ],
    Default : 0
  Gamma
    ID      : 0x00000006,
    Type    : Dword,
    Flags   : { CAN_READ, CAN_WRITE },
    Values  : [ 0 .. 7, step size: 1 ],
    Default : 3
  Power Line Frequency
    ID      : 0x0000000d,
    Type    : Choice,
    Flags   : { CAN_READ, CAN_WRITE },
    Values  : { 'Disabled'[0], '50 Hz'[1], '60 Hz'[2] },
    Default : 0
  Sharpness
    ID      : 0x00000007,
    Type    : Dword,
    Flags   : { CAN_READ, CAN_WRITE },
    Values  : [ 0 .. 96, step size: 1 ],
    Default : 40
  Exposure, Auto
    ID      : 0x0000000f,
    Type    : Choice,
    Flags   : { CAN_READ, CAN_WRITE },
    Values  : { 'Manual Mode'[1] },
    Default : 0
  Exposure (Absolute)
    ID      : 0x00000011,
    Type    : Dword,
    Flags   : { CAN_READ, CAN_WRITE },
    Values  : [ 20 .. 5000, step size: 1 ],
    Default : 79
  Exposure, Auto Priority
    ID      : 0x00000010,
    Type    : Boolean,
    Flags   : { CAN_READ, CAN_WRITE },
    Values  : [ 0 .. 1, step size: 1 ],
    Default : 0
To set the exposure, you can issue the command:
The camera remembers the value, so you do not need to set it again. Some controls can not be set, or can be set to one value only (e.g., "Exposure, Auto Priority" can not be set, while "Exposure, Auto" can only be set to the value 1). The Live! Cam Optia seems a particularly broken device, that thankfully is no longer produced.
Later, I bought a Logitech Quickcam E3500, which is a cheap UVC-compliant camera which produces reasonable images at 640×480 resolution. More information are available on a separate page.
Reliability Considerations
After some thousands pictures taken as described above resulted in TWO broken cameras, a few considerations are in order. Apparently, (cheap) digital photo cameras are not built to sustain heavy usage such as taking picture continuously. My PowerShot A40 broke first, resulting in "washed out" images. Then I got a PowerShot A80, which worked fine for a while until it broke down as well. The A80 started producing very dark (almost black) images, with occasional violet stripes and other artifacts. I suspect that it got affected by the issue described in this Canon advisory (see also a longer explanation). Unfortunately, the Canon repair center I contacted did not recognize the issue and was not willing to repair the camera for free, so I have thrown the camera away.
If should be observed that I may have been unluky: I know of a PowerShot A70 which is happily taking pictures every 5 minutes since many years without any issue, so YMMV. As far as I'm concerned, I'm going to experiment a bit more with cheap UVC-compatible webcams, as they don't have moving parts, the USB communication with the host PC is more reliable, and recent models have a sufficient image quality.
Resources
- fswebcam is a very nice program to capture snapshots from a USB camera.
- Canon SDK Documentation page. Contains a comprehensive list of remote capture capabilities of many Canon digital cameras; note that the page refers to Canon official SDK only, so cameras listed there are not necessarily supported by gphoto2. Nevertheless, if a camera is reported not to support remote control with the Canon SDK, it won't be supported by gphoto2 as well.