Creating multi-page PDF documents from scanned images in Linux
About
This document describes a simple procedure for producing multi-page PDF documents from scanned pages with Linux. Everything started with a simple use case: I had a bunch of old issues of the long-defunct Commodore Computer Club italian computer magazine which I wanted to preserve. That magazine is quite challenging to scan: each issue has about 100 pages, some full color, some grayscale, and others black and white. Since I don't have a scanner with automatic sheet feeder, I needed a simple interface to quickly control the scanner using the PC keyboard only. All pages had to be post-processed before being assembled into the final PDF. Post-processing includes color reduction/calibration, deskewing (rotating misaligned pages), clearing noisy regions so on. There are few open source applications which deal with this kind of workflow (some of them are listed in the Resources section), so I began assembling my own set of tools based on ImageMagick, libTIFF and shell scripts. Apart from the scan interface, everything else is accomplished through the command line.
The procedure I describe here is far from perfect; some manual work may still be required to fix some pages; furthermore, some scripts have hard-coded values that only work for my specific setup. Despite these limitations, I was able to acquire and process a single issue of the magazine in about one hour; most of the time is spent scanning the pages, while post-processing takes significantly less time and can be almost automated. You can see the final result for CCC issue 78 which is hosted at the Ready64 CCC site.
I have tested this procedure both with Debian GNU/Linux 4.0/i686 and with Ubuntu 6.06/AMD64 using either an Epson GT7000 SCSI scanner and an HP DeskJet C3180 all-in-one printer/scanner. Again, remember that the scripts below are tied to my particular use-case. You will find a lot of hardcoded constants which are related to the particular size and type of my scanned material.
Update (2012-09-06). Before you start to fiddle with the scripts below, I suggest you to give Scan Tailor a try. Scan Tailor provides a graphical interface for enhancing scans (deskew, B/W conversion, text segmentation, border removal), and is more intuitive and general-purpose than my scripts. The interface of Scan Tailor is a bit rough, but the program works almost flawlessly. I used it recently to process the scans of two 200+ pages books quickly and effectively, and I strongly recommend it.
Required software
This is the list of the required software:
- ImageMagick; this software is
the
Swiss army knife
of image processing tools. It can do basically everything on an image, and can do that from the command line. We will use it to convert and clean up the scanned images. - libTIFF and related utilities; this suite contains some command-line utilities which are required to manipulate TIFF images and convert them to PDF.
- netpbm. We use the netpbm
pamtiltutility to automatically deskew images (Update 2012-09-06: you no longer need this, since this functionality is directly provided by recent versions of ImageMagick). Deskewing is the process of automatically rotating the scanned pages so that the text is horizontally aligned. Despite the amount of care you put, you will never be able to align the source material on the scanner surface, hence you will need an automatic deskewing tool to adjust the image for you. - SANE; you scanner needs to be
supported by a SANE
backend. The simple Tcl/Tk GUI application uses the
scanimagecommand included with SANE to acquire the image. - Tcl/Tk; with this I wrote a very simple
interface to speed up scanning lots of material with
scanimage. - A couple of scripts (
tkScan.tclandcleanup_scans.sh), described later on.
Step 1: Setting up tkScan.tcl
First of all, we need to acquire the raw material using a scanner. We need a scanner which is supported by SANE. Check out the list of SANE supported devices to see if your scanner works with Linux.
In order to speed up the scanning process, I wrote tkScan.tcl, a very simple Tcl/Tk GUI for
scanning multi-page journals, magazines or books without the need of
an automatic sheet feeder. tkScan.tcl allows the user to
quickly control various aspects of the scan using the keyboard
only.
tkScan.tcl uses the scanimage
command to control the scanner. To be more precise, the actual scan
command issued is:
It is a good idea to try this command by hand, just to be sure that everything is setup correctly. Enter this:
If everything goes well, you should have a (big) file named
test.tif which contains a grayscale version of the
scanned page.
Should tkScan.tcl fail on your particular setup, it
might be for one of the following two reasons:
- Wrong scan mode. It appears that the scan mode
strings are not the same for all devices. At least it is so for me,
where the Epson GT7000 uses "Grayscale" as the scan mode for grayscale
images, while the HP C3180 uses "Gray" for the same mode. So, your
scanner might not understand the
--mode Grayoption.tkScan.tcluses the string "Gray" for scanning grayscale and B/W images, and "Color" for color pages (note: B/W TIFFs are derived from grayscale images using ImageMagick'sconvertutility, as it does a better job than most native scanner "Lineart" or "B/W" scanning modes). To see which modes are supported, usescanimage -h. For my HP C3180, this command gives, among other things:Scan mode: --mode Lineart|Gray|Color [Color] Selects the scan mode (e.g., lineart, monochrome, or color).You then need to change the functionscanPage_BW,scanPage_GrayandscanPage_ColorintkScan.tclto reflect the actual supported scan modes. - Wrong default scanner: If you have more than one
SANE-supported device (e.g., scanner, webcam, video card...), you can
select the default one by setting the environment variable
SANE_DEFAULT_DEVICE. For example, to havetkScan.tcluse my Epson GT7000 SCSI scanner I set (with bash):export SANE_DEFAULT_DEVICE="epson:/dev/scanner"While for my HP DeskJet C3180 all-in-one printer/scanner, I set:export SANE_DEFAULT_DEVICE="hpaio:/usb/Photosmart_C3100_series?serial=MY694C40Y704P9"
Please refer to SANE documentation on how to setup your scanner.
Step 2: Scanning the Raw Material
Simply invoke the
tkScan.tcl script.
Here is a screenshot of this script in action:

For each scanned page, tkScan.tcl produces two files:
scanNNN.image and
scanNNN.preview. scanNNN.image is the actual
scanned page in uncompressed TIFF
format, while scanNNN.preview is a small GIF version of
the page used in the preview window. NNN is the current page number,
as can be seen in the "Current page" counter. Press the + or - keys to
increase/decrease the page number. Note that the page number is
not automatically increased after a scan. If you do not
manually advance it, you will overwrite the current page.
When using tkScan.tcl, make sure to have enough disk
space, as all pages are acquired as uncompressed TIFF images. This
ensures that the raw scans are of highest possible quality, so that
later processing produces still good images.
The following table summarizes the key binding for the
tkScan.tcl application.
| Key | Binding |
|---|---|
| + | Increment the page number |
| - | Decrement the page number |
| Alt+G | Select Grayscale mode |
| Alt+C | Select Color mode |
| Alt+B | Select Black/White mode |
| Alt+S | Scan |
| Alt+D | Delete the current page |
| Alt+Q | Quit the program |
Step 3: Cleaning Up the Images
After the previous step is completed, you end up with a bunch of raw scanned pages, which need further processing: you will invariably get some misaligned (rotated) pages; furthermore, there might be dark borders around the pages, due to paper bending.
Tweaking each page manually is very time consuming. In order to
automate the post-processing, I prepared a script named cleanup_scans.sh which tries
to improve the quality of the raw scans. The script deskews (rotates)
the pages and removes the dark border. Moreover, it crops each page to
remove unused borders (but please note that the crop dimension is
hard-coded to fit the pages I used to
scan). cleanup_scans.sh uses ImageMagick and netpbm to do its job.
The general syntax of cleanup_scans.sh is the following:
It is possible to process multiple pages with a single
invocation. For each inputfile, which must be a TIFF image, the script writes a
processed TIFF image named
inputfile.tiff. cleanup_scans.sh understands the
following command-line flags:
--nodeskew- Turns off automatic deskewing of the input image. When
deskewing is on, the script tries to figure out (using the
pamtiltcommand from netpbm) the rotation angle to apply to the image in order to align the text with the borders. After that, it rotates the image by the identified angle (default: deskew is on) --nodeborder- Do not remove the dark border of the scanned page (default: remove border)
--forcecolor- Do not convert grayscale images to black and white. By default, grayscale pages are converted to B/W images.
Now, there is a bad news and a good news. The good news is that
cleanup_scans.sh works most of the times. The bad news is
that it is far from perfect, so expect that some pages will still
require manual adjustments. Furthermore, the
cleanup_scans.sh script contains some hardcoded
parameters which I used for my own scans. You will need to tweak these
parameters to suit your needs.
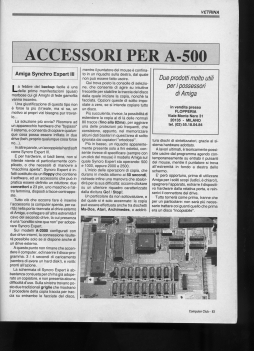
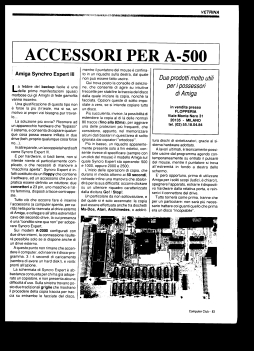
Let us consider a practical example. We start with the following grayscale page which has been acquired at 300dpi:
As can be seen, this page has a number of problems:
- There is a black border around the page;
- The page is slightly rotated;
- The background of the page is gray, and not white. This is due to the fact that this page was printed on recycled paper.
To fix this scan with the cleanup_scans.sh script, we
execute the following command:
This produces another image named raw_page.tiff.tiff
(the name is ugly, I know...) which has all the aforementioned defects
removed. The output image is a B/W TIFF; if you want a grayscale one,
you must give the additional --forcecolor flag:
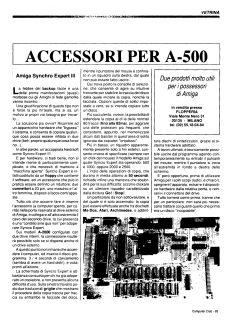
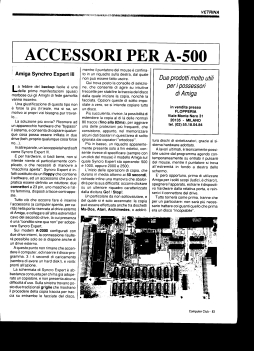
On the left, you see the result without the
--forcecolor flag; on the right, you see the grayscale
result with the --forcecolor flag.

In order to understand the logic behind this script, here are the main operations it performs.
B/W Conversion
If required, we first convert the image to B/W. There are many ways to do so with ImageMagick. The one I used is the following:
The -blur 2 flag is used to "smear out" the gray-ish
areas, so that they become white in the converted image. The
-level 10%,90%,1 flag is used to balance the gray level,
so that the page background becomes white. This is the result:
Black Border Removal
Now, we remove the black border using the following trick. We draw
a black border all around the page, and use the floodfill
ImageMagick operator to fill this black border with a white color. So,
every black artifact which intersects our border will become
white.
To add the border, we do the following:
We obtain this image:
Now we use the floodfill operator to fill the border:
At this point, we have a B/W page with the border removed:
This approach is not perfect. There may be black artifacts
which do not intersect our border, so these will remain after
the floodfill operation. In these cases, either increase
the size of the additional black border (ensure it does not intersect
the content of the page), or remove all remaining artifacts by hand at
the end.
Deskewing and final compression
Update (2012-09-06). Recent versions of ImageMagick provide an automatic deskewing functionality built-in. The command convert raw_page_bw_noborder.tiff -deskew raw_page_bw_deskewed.tiff does the trick. The text below was written when such feature was not available.
Now we determine the page tilt with the help of the
pamtilt utility (which is part of the netpbm
package):
We discover that the page tilt is 0.57 degrees; so we need to rotate the page 0.57 degrees counterclockwise as follows:
The result is a B/W page with border removed, and which has been deskewed:
Note the use of -compress Group4 flag, to compress
the B/W image. Using Group4 compression, we get a B/W image with size
99KB, starting from an original (grayscale) image of 8924KB!
In general, image deskewing is a hard task, and there are different tools which can do that. Apart from netpbm, you might want to consider the Leptonica library, which contains an extensive set of image processing tools. Among other things, Leptonica can automatically deskew images.
Step 4: Producing the PDF
Suppose we have a bunch of processed images named
scan001.tiff, scan002.tiff and so on; all
B/W images are already compressed with the Group4 algorithm (see
above). We can generate a PDF document from all these pages in two
easy steps. First, copy all TIFFs into a single (multi-page) TIFF
magazine.tiff
using tiffcp:
Then, convert the multi-page TIFF magazine.tiff
into a single PDF using tiff2pdf:
Note the use of the
-j flag of tiff2pdf, in order to enable jpeg
compression of the color pages. tiff2pdf supports
additional command line switches to include additional metadata
(document title, author, and so on). See the man page for details
For reference, a 90 pages issue of one of my magazines acquired at 300DPI, with mixed color and grayscale pages produced a 20-30MB PDF. It might seem a lot of space (it is, indeed), but you should consider that the raw TIFFs take much (and I mean MUCH) more space. Group4 compression is particularly effective on B/W pages; a monochrome document can be compressed into a reasonably small PDF.
You may optionally "optimize" the PDF file using the command:
According to pdfopt man page, optimized PDFs can be displayed more quickly when accessed through a network.
Resources
- Scan Tailor is an interactive post-processing tool for scanned pages. It performs operations such as page splitting, deskewing, adding/removing borders, and others. I tried this program and works very well: highly recommended.
- Unpaper. This is a great tool
for processing scanned data, with a particular emphasis on scanned
books.
unpaperdoes everything my simple script does, and much more. - SANE-PyGTK is a simple SANE frontend written in Python.
- OpenDIAS. The openDias project brings a professional document scanning and storage utility to the home user. OpenDias (Document Imaging Archive System) provides document storage and a document work-flow application to the home or small business use.
- gscan2pdf is a GUI for producing PDFs from scanned images.
- The Leptonica library includes many advanced algorith,s for image processing, and is therefore definitely worth having a look at.